| |
Game Center CX Season 4 – Back to Contents
#21
帰ってきたョ「ウルトラマン」
He’s Back! "Ultraman"
Chousen
After the promotion to Kacho at the end of last season, Arino debuts a new suit to go with it! (Well, he had it in the season 1 special, but still). But enough with the pleasantries, let’s get right to the challenge. It’s Ultraman for the Super Famicom, one of the earliest games for the system. Ultraman fights one-on-one with his toughest enemies, and it’s Arino’s job to get right to the end of the line. Stage 1 is against the goofy looking Bemular. Arino’s opening strategy is to simply back away as far as he can. He fires a beam without really knowing what it does, but it takes a good chunk of Bemular’s energy away.

In this first try, he’s not so lucky. He continues to get hammered by Bemular until he finally dies. He spends one of his 3 credits, and then it’s back to the action. Eventually he gets Bemular down to FINISH status, but he starts backflipping away to check the manual on what to do. In the game, a meter at the bottom of the screen slowly fills up and activates four different lasers. Arino can’t actually win a fight until A) the enemy’s life is low enough to display "FINISH" and B) the meters are filled all the way to the "SP" beam, which finishes off the bad guy. In the meantime he simply has to stay alive.

Arino tries the beam, but it’s already way too late, as Bemular regained a sliver of energy and the FINISH went away. He now has to kill time as the meter refills. But just when it gets to be the right time, the timer dips below 60 seconds! Arino panics a little and starts slapping Bemular around, and finally gets the SP again. He fires it again, but he’s too late once more! He resorts to futility, kicking Bemular repeatedly in hopes it will speed things up. But with 12 seconds left, Bemular deals the final blow and Arino dies again. It’s the first stage, and already so much stress!

On the third try, Arino just starts throwing Bemular over his head a few times, until finally everything’s squared away. He fires the SP and finally finishes Bemular! The next match is against Telesdon. Arino uses a similar strategy of just kicking Telesdon in the gut repeatedly, but ends up dying and getting a Game Over.

He hoped to continue at Telesdon, but starts over at Bemular. The staff laughs. He has no choice, but at least he defeats Bemular much more quickly this time. Same with Telesdon, too! Then it’s on to face Jamyra. He continues to struggle with this one. He tries his patented "backflip the hell away" technique, but Jamyra shoots a fireball from far away and hits Arino when he reaches the end of the screen, killing him. At least he got the #10 spot on the leaderboard. As usual, he puts in his name as "SEX,", that is until he sees there’s a four-character limit. "SEXY" it is!

Back to the fight. Arino dies much in the same way as last time. On the next try, he runs to the other end of the stage, waits, and the fireball tags him again! At least everyone’s taking it with good humor by now. On the seventh attempt Arino tries hitting Jamyra with a beam, but it dodges it! On the ninth try, after he almost misses, Arino finally downs Jamyra. Next up is Bullton, a giant roly-poly thing that barely knows when to stop. When it does, it fires two little shots from its antennae and if they connect, they freeze Ultraman in place and suck his energy away. It’s not long before Arino gets hit with one and starts panicking, but manages to get out of the way before Bullton follows it up. He dies eventually anyway and gets a Game Over.

Arino continues to climb up the ranks from the start, but after facing Bullton nine times and losing each time, he starts to get anxious. He turns to the whiteboard and starts jotting down some simple strategy against his opponents to try and get the upper hand. Back to Bullton, and therefore more deaths. 22 attempts and still no sign of progress. Finally, AD Urakawa comes into frame to offer some advice. The main tip? Use Ultraman’s barrier move to reflect Bullton’s shots. Arino tries it out, but he still isn’t fast enough to evade Bullton’s other attacks and dies for the 23rd time.

And the 32nd time! Arino’s even more stressed by now. Just then, AP Tojima comes in and offers some more advice: Urakawa’s barrier strategy sucks. That, and to truly win, Arino should try leaping backwards until the meter fills up, then purposefully use the SP beam early to weaken Bullton. Arino does just that, and the beam halves Bullton’s energy! With nary a scratch on him, Arino keeps up the pattern. Unfortunately Bullton smartens up and trips up Arino more than once. His health is lower now, and in the middle of getting his groove back, the timer starts blaring! He panics and ends up dying again.

On the next try (number 34, by the way), Arino tries Urakawa’s technique again. After a close call, he finally manages to get Bullton down to FINISH, and then zaps his ass away. Much applause. But it’s not over yet — onto Red King. Amazingly, he whittles down King’s energy just by tossing him from side to side, but just when it looks like he’ll pull through on the first try… he doesn’t. But that was just a warm-up for the second try, wherein he nails it.

Stage 6: the alien Baltan. Early on, Baltan splits into two, sending Arino into a panic and eventually — naturally — death. Back to stage 1 again. After falling once more to Jamyra, Arino decides to just reset the entire game and start anew. He gets back to Baltan, but dies in the same way. He tries to use the barrier technique against Baltan, which for the most part works, but by the time Baltan’s down to FINISH, the beam meter is hardly full. He gets tripped up and dies once again. This continues well up to the 13th attempt, where he finally lands a finishing blow. Next is Gomora, the armadillo-lookin’ dude. Arino’s nearly killed on the first try, but he shoots off a beam to send Gomora’s life to near-nothing. However, it’s no use. Attempt two: win. But things are about to come to a head.

Arino now faces the alien Mefilas. He’s a fast one, expertly dodging all of Arino’s drop kicks. He also teleports before he attacks, which naturally sends Arino out of whack and into eventual death. On the 10th attempt, he gets Mefilas down to FINISH, but he almost dead too, and each time he tries to get up to fire the SP beam, he’s hit with Mefilas’ own beam. On attempt 12, Arino manages to fire the beam, but Mefilas was off-screen! It didn’t count! Down to 30 seconds left on the clock, he hurriedly tries to knock Mefilas down again. He fires the beam and — it’s countered by Mefilas’s beam! Failure! Everyone laughs in a combination of humor and anger.


But something happens. Arino didn’t really lose, he just triggered a cut-scene. Just like on the TV show, Mefilas is more around to study and test Ultraman than destroy him. He disappears, and so ends the stage. Arino then goes up against Geronimon, a big blue whatever-saur. He has some pretty powerful attacks and he moves rather quickly, so Arino is wasted in no time. Back to stage 1…

On the second try, Arino fires the SP beam, but Geronimon ducks to avoid it! On attempt five, however, after a lot of moments getting tripped up, he succeeds. Much applause from that one. It’s now been 11 hours since start time. Stage 10, the final one, looms. And with it, Ultraman’s greatest foe, Z-Ton. Z-Ton is quite the contender: he teleports, shoots long-range spread beams, and is awfully fast. On top of that, he’s good at deflecting any of Ultraman’s beams and sending them right back to him. So needless to say, Arino gets ravaged the first time through. He tries to be a little smarter on the next try, but Z-Ton continues to teleport and sneak up behind him, and it takes forever for Ultraman to turn around. He dies even quicker than last time, though, and this one sends him back to stage 1.

He gets back to Z-Ton, and tries firing the SP beam. Z-Ton holds it for a while, and Arino hurriedly jumps out of the way, yelling "watch ouuut!" the entire time. He pauses right in the middle of it to take a breath. He gets back to the game, only to die right after. Urakawa and Tojima come up to pay a visit. Despite his earlier dismissal, Tojima has Urakawa deliver some more advice.

Urakawa’s tip? Frequent use of the drop kick. Doing so at the edge of the screen with the right timing will probably hit Z-Ton with a greater success rate than before, as he will tend to teleport right in front of Ultraman’s foot. Urakawa sits down with Arino as he tries out the tactic. He manages to get a couple of hits in, but his timing still isn’t great, and he dies. Finally, Arino has Urakawa try it out himself. He only does slightly better before dying. On the next try, Arino comes insanely close to beating him this time! Urakawa tells him when to jump, and he starts landing kicks more often. Eventually, Z-Ton gets Arino’s life way down, but he starts mashing the kick button and shaves a little more of Z-Ton’s health. But soon after Arino jumps to evade a perceived attack, only to get whacked in the back and die once again.

With one life left, he goes in again. The pressure mounts. On this sixth attempt, he does even better than last time, but still ends up getting his life whacked down a bit. So down, in fact, that the bar is down to an invisible sliver! Arino lands one more drop kick — and Z-Ton displays FINISH! The staff erupts, but as soon as Arino touches down, Z-Ton takes a swipe and kills him. The room explodes with screams and groans.

The game restarts, and the producer chimes in. This is going to be the absolute last chance. Arino makes it back to Z-Ton in just 40 minutes. He fails the next attempt, but after that he gets Z-Ton down to near-Finish. Arino manages to throw Z-Ton, and then he instantly fires the SP beam, but it’s too soon! Z-Ton’s life wasn’t gone yet! Arino screams and ends up dying again. On the ninth attempt he nears success, but the beam meter isn’t full. He manages to stall long enough to get the meter up, and then fires the beam. He almost misses, but hits Z-Ton in the leg in mid-jump. Oh crap, still too soon! The FINISH cue is too brief! He takes his last continue and tries it one more time. Amazingly, he gets Z-Ton down to FINISH and fires the beam in time. But wait! Z-Ton absorbs the beam and fires it back! Ultraman collapses.

The screen fades. Another cut-scene. appears with Z-Ton standing over Ultraman. Ultraman’s supporters must destroy Z-Ton themselves with a miniature rocket. They only have one chance! That is to say, Arino only has one chance! The game shifts to a shooting-gallery type screen with a crosshair aimed at Z-Ton. Urakawa steps in and provides one last bit of reassurance. Arino begins. He studies Z-Ton’s pattern for a few seconds before pausing right as the cursor’s placed on the boss. He takes a breather, and resumes. Again, he watches Z-Ton’s pattern. Timing is everything. Arino keeps the cursor steady and waits for Z-Ton to step into it. He fires. Dead silence.

HE MOVED! Z-TON MOVED RIGHT AFTER HE FIRED! OH MY GOD! "GAME OVER" appears and Arino reels. It’s over. He decides he might as well demote himself for this one. So much for that fancy blue uniform.

Tama ni Ikunara Konna Game Show
Arino, in costume, visits the 2005 Tokyo Game Show at the Makuhari Messe, and is in a mood to crack wise at everything inside. As he comes down the big escalator that leads to the show floor, the first booth he points out is Microsoft’s Xbox 360 display. So once he gets down to the floor, that’s his first visit. He picks up a pamphlet from one of the workers at the booth, until he notices the booth girl behind him and grabs a pamphlet from her instead, though he admits he’s looking at her midriff out of the corner of his eye.

He continues to the play area and sits down in one of the funky chairs as another girl shows him how to play Kameo. He’s mighty impressed by the graphics! But soon it’s time to move on. He’s just in time for a live demonstration of Tokimeki Memorial Online. But then he points out the PlayStation 3 booth. He gets behind the crowd taking pictures of the system under glass, then scoots his way in for a closer look. He teases the crowd by trying to block their view of the system and wanting them to photograph him, but they just keep on snapping pictures anyway.

As he continues walking around, Arino notices a cosplayer hiding behind one booth. He goes up to her and the two trade business cards. Arino pauses, and then starts yelling "Moe! Moe! Moe!" in a goofy voice. The girl just laughs while frozen in place. From there it’s on to the, um, game schools booth. As he begins to enter, a gaggle of schoolgirls recognize him. He thanks them and then continues toward the booth to try some sample games. And so ends the first part of the TGS visit.

Arino passes by the Square Enix booth in part two and borrows a pen from one of the booth girls so he can fill out an attendance survey there. Of course, she doesn’t have just one, but three different mascot pens! Next is a much smaller booth: Hamster, publishers of "The Conbini" as well as a few retro arcade ports. Arino checks out Burgertime on PS2, but quickly gets trapped by the wiener.

After that is a stroll into the Korean games pavilion. Arino starts off with a funky cell phone game on an equally funky cell phone that flips out into a keyboard form. He’s easily impressed, but can’t do much with it when everything on the screen’s in Korean. He caps off the visit not with a video game, but a prize catcher featuring a bulldozer that grabs and pushes prizes down into a hole. After that, Arino bids the viewer goodbye with an armful of swag.

Urawaza Jet Stream
A viewer recants his precious memories messing with his sister while playing Mario Bros., and then requests the pause trick, which sinks Mario into the ground a few pixels, unable to escape!

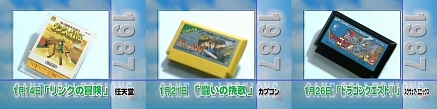
Game Collections: 1987: January
|

 The Game Center CX Episode Guide